Color correction and grading are essential steps in the post-production process. These techniques allow filmmakers to adjust and enhance the visual aesthetics of their footage, creating a cohesive look that supports the story and mood of the film.

From primary tools like lift, gamma, and to secondary tools like and , colorists have a wide array of options. These tools enable them to make precise adjustments, from basic exposure corrections to complex artistic looks that define a film's visual style.

Color correction vs color grading

  • Color correction involves adjusting the overall color, , and exposure of an image to achieve a natural, balanced look that matches the intended visual style and maintains consistency across shots
  • Color grading goes beyond correction to create a specific artistic look or style that enhances the mood, atmosphere, and narrative of the film through creative color manipulation
  • While color correction aims for technical accuracy and consistency, color grading allows for artistic expression and visual storytelling through the use of color

Primary color correction tools

Lift, gamma, gain controls

Top images from around the web for Lift, gamma, gain controls
  • Lift adjusts the black point and shadows of an image, allowing you to control the overall brightness and color balance of the darkest areas
  • Gamma affects the midtones, which comprise the majority of the image, and is used to adjust contrast and color balance in this range
  • Gain controls the white point and highlights, enabling you to set the brightness and color of the brightest areas without clipping

Color wheels for shadows, midtones, highlights

  • Color wheels provide a visual interface for adjusting the hue and of specific tonal ranges (shadows, midtones, and highlights)
  • Each is divided into sectors representing different colors, allowing you to make targeted adjustments by dragging the control point towards the desired hue
  • Adjusting the distance from the center of the wheel controls the saturation, while the angle determines the hue

Hue vs saturation curves

  • allow you to make precise adjustments to specific colors within an image without affecting other hues
  • The horizontal axis represents the original hue, while the vertical axis represents the adjusted hue or saturation
  • By creating control points on the curve, you can selectively change the hue or saturation of a particular color range (reds, greens, blues)

Contrast and pivot controls

  • Contrast controls the overall difference between the darkest and brightest parts of an image, affecting the perceived dynamic range
  • Increasing contrast makes shadows darker and highlights brighter, while decreasing contrast compresses the tonal range
  • The pivot control sets the midpoint around which the contrast adjustment is made, allowing you to maintain the brightness of a specific tonal range while adjusting contrast

Secondary color correction tools

Hue vs saturation curves

  • In addition to their use in , hue vs saturation curves are powerful tools for
  • They allow you to isolate and adjust specific colors within an image without affecting other hues, making them ideal for targeted corrections
  • Examples include adjusting skin tones, enhancing foliage, or changing the color of a specific object (car, clothing)

Luma and chroma keyers

  • isolate areas of an image based on their brightness (luminance), allowing you to make targeted adjustments to specific tonal ranges
  • , also known as color keyers, isolate areas based on their color (chrominance), enabling you to select and modify specific hues
  • These keyers create masks that can be used to apply color corrections or effects only to the selected areas (sky, green screen)

Power windows for targeted adjustments

  • Power windows are shape-based masks that allow you to isolate and adjust specific areas of an image
  • They can be created using geometric shapes (circles, rectangles) or custom-drawn shapes using bezier curves
  • Power windows are useful for making localized color corrections, such as brightening an underexposed face or darkening an overexposed background

Trackers for moving objects

  • Trackers analyze the motion of an object or area within a shot and generate data that can be used to automate the movement of power windows or other masks
  • They ensure that the selected area remains consistent throughout the shot, even if the camera or subject moves
  • Trackers are essential for maintaining accurate secondary color corrections on moving objects (vehicles, characters)

Color grading techniques

Applying creative looks and styles

  • Creative looks and styles involve using color grading to establish a distinct visual aesthetic that supports the mood, genre, or narrative of the film
  • This can be achieved by manipulating the overall color palette, contrast, and saturation to create a cohesive look across scenes
  • Examples include the desaturated, high-contrast look of a gritty crime drama or the warm, golden tones of a period piece

Emulating film stocks and processes

  • Color grading can be used to emulate the characteristics of specific film stocks or processing techniques, such as the grain structure, color response, and dynamic range
  • This allows filmmakers to achieve a particular aesthetic associated with a certain era or style of filmmaking (1970s Kodachrome look, bleach bypass)
  • Emulation can be achieved through the use of film stock presets, grain overlays, and custom color adjustments

Enhancing mood and atmosphere

  • Color grading plays a crucial role in establishing the emotional tone and atmosphere of a scene or entire film
  • By carefully selecting and manipulating colors, you can evoke specific feelings or psychological responses in the audience (cool blue tones for sadness, warm orange for comfort)
  • Examples include using desaturated colors and cool tones to create a sense of unease in a horror film or vibrant, saturated colors to convey the energy of a musical

Matching shots for continuity

  • Ensuring color continuity across shots is essential for maintaining a seamless viewing experience and avoiding distractions
  • Color grading is used to match the exposure, color balance, and overall look of adjacent shots, especially when they were filmed under different lighting conditions or with different cameras
  • Techniques include using color match tools, copying grades between shots, and visually comparing shots side-by-side

Color management systems

ICC profiles for consistent color

  • ICC (International Color Consortium) profiles are standardized color management tools that ensure consistent color representation across different devices and software
  • They define the color characteristics of a specific device (camera, monitor, printer) or color space (sRGB, Adobe RGB)
  • By embedding in your footage and project settings, you can maintain accurate color throughout the post-production pipeline

Display calibration and profiling

  • involves adjusting the settings of your monitor to ensure accurate color representation and consistency with industry standards
  • This process typically includes setting the white point, brightness, contrast, and gamma to match a reference standard (D65, 2.4 gamma)
  • Profiling your display creates an ICC profile that describes its unique color characteristics, which can be used by color management systems to ensure accurate color rendering

Color space conversions

  • Different devices and stages of the post-production pipeline may use different color spaces, such as camera log, sRGB, or
  • are necessary to maintain consistent color appearance when moving between these spaces
  • Proper color management involves setting the correct input and output color spaces in your color grading software and using the appropriate ICC profiles for each conversion

Scopes for analyzing color

Waveform monitors for luminance

  • display the luminance (brightness) values of an image on a graph, with the horizontal axis representing the image from left to right and the vertical axis representing the luminance range
  • They allow you to analyze the exposure and contrast of an image, ensuring that the shadows, midtones, and highlights fall within the desired range
  • Waveform monitors are useful for identifying and correcting exposure issues, such as crushed blacks or clipped highlights

Vectorscopes for chrominance

  • display the chrominance (color) information of an image on a circular graph, with the angle representing the hue and the distance from the center representing the saturation
  • They help you analyze the color balance and saturation of an image, as well as identify any color casts or unwanted tints
  • Vectorscopes are particularly useful for ensuring skin tones fall within the appropriate range and for matching colors across shots

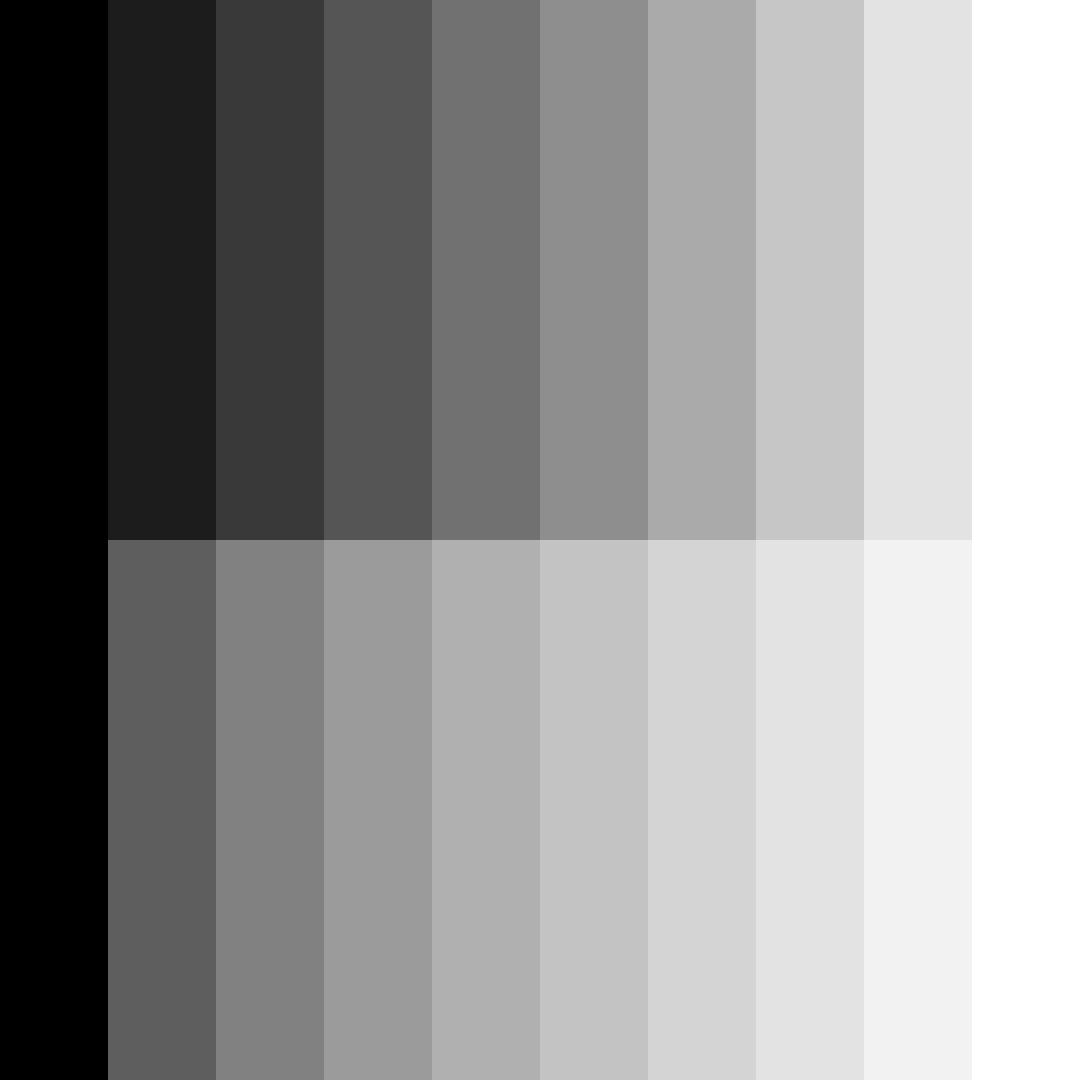
Histograms for tonal distribution

  • display the distribution of tonal values in an image, with the horizontal axis representing the brightness range from black to white and the vertical axis representing the number of pixels at each brightness level
  • They provide a quick overview of the exposure and contrast of an image, helping you identify any clipping in the shadows or highlights
  • Histograms are useful for ensuring a balanced tonal distribution and avoiding excessive contrast or flatness

Parade displays for color channels

  • show the individual color channels (red, green, blue) of an image as separate waveforms, stacked vertically
  • They allow you to analyze the color balance and saturation of each channel independently, helping you identify and correct any color imbalances or shifts
  • Parade displays are useful for ensuring consistent color across shots and for identifying issues such as color contamination or channel clipping

Node-based vs layer-based workflows

  • , common in software like , use a graph-like structure where each color correction or effect is represented as a node, connected in a specific order
    • Nodes can be rearranged, bypassed, or grouped to create complex corrections and effects
    • This non-destructive approach allows for greater flexibility and the ability to make targeted adjustments without affecting other parts of the image
  • , found in software like Adobe SpeedGrade, use a stack of layers, each containing a specific color correction or effect
    • Layers are applied in a fixed order, with the topmost layer affecting the layers beneath it
    • While less flexible than node-based workflows, layer-based approaches may be more intuitive for users familiar with layer-based compositing software (Adobe Photoshop)

Hardware control surfaces

Dedicated panels for color grading

  • Dedicated color grading control surfaces, such as the DaVinci Resolve Advanced Panel or the , provide a specialized hardware interface for color correction and grading
  • These panels offer a range of physical controls, including trackballs, dials, and buttons, designed specifically for color grading tasks
  • Dedicated panels can significantly improve the speed, precision, and ergonomics of the color grading process compared to using a mouse and keyboard alone

Customizable button layouts

  • Many color grading control surfaces feature customizable button layouts, allowing you to assign specific functions or tools to individual buttons
  • This customization enables you to create a personalized workflow tailored to your preferences and the needs of your project
  • Examples include assigning frequently used primary or secondary correction tools, keyframe controls, or reference stills to specific buttons for quick access

Trackballs and dials for precise adjustments

  • Trackballs and dials are essential components of color grading control surfaces, providing intuitive and precise control over color adjustments
  • Trackballs, typically arranged in sets of three, allow you to manipulate the color balance and saturation of the lift, gamma, and gain regions independently
  • Dials, or rotary encoders, enable fine-tuned adjustments to parameters such as contrast, hue, saturation, or color temperature, with the added benefit of tactile feedback

Color grading software options

DaVinci Resolve for comprehensive toolset

  • DaVinci Resolve, developed by Blackmagic Design, is a powerful and widely-used color grading software that offers a comprehensive set of tools for both color correction and grading
  • Its node-based workflow, advanced color management, and extensive set of primary and secondary correction tools make it a favorite among professional colorists
  • DaVinci Resolve also includes a full-featured non-linear editor, audio post-production tools, and visual effects capabilities, making it a versatile solution for post-production

Adobe SpeedGrade for integration with NLEs

  • Adobe SpeedGrade is a layer-based color grading software that integrates seamlessly with other Adobe Creative Suite applications, such as Premiere Pro and After Effects
  • Its tight integration with Adobe's non-linear editors allows for a smooth workflow, with the ability to transfer projects back and forth between applications
  • SpeedGrade offers a range of primary and secondary color correction tools, as well as the ability to apply creative looks and

FilmLight Baselight for high-end features

  • FilmLight Baselight is a high-end color grading system used in top-tier post-production facilities and feature film workflows
  • It offers a powerful and flexible node-based workflow, advanced color management, and a wide range of primary and secondary color correction tools
  • Baselight is known for its color space agnostic architecture, which allows for seamless handling of different camera formats and color spaces within the same project
  • The system also features a comprehensive set of tools for film emulation, grain management, and HDR (High Dynamic Range) grading

Key Terms to Review (36)

Adobe Premiere Pro: Adobe Premiere Pro is a professional video editing software that allows users to edit and assemble footage, add effects, and perform color correction and grading. This powerful tool is widely used in the film and television industry, offering advanced features that connect seamlessly with other Adobe Creative Cloud applications, enhancing the workflow for color management, grading techniques, and HDR content creation.
Calibrated monitor: A calibrated monitor is a display screen that has been adjusted to ensure accurate color reproduction, allowing filmmakers and editors to make precise decisions during color correction and grading processes. This accuracy is essential for maintaining consistency in color across different devices and platforms, ensuring that the final output matches the intended visual aesthetic. Proper calibration involves using specialized tools and software to align the monitor's color settings with industry standards.
Chroma keyers: Chroma keyers are tools used in video production that allow filmmakers to replace a specific color in a video with another image or video. This technique is commonly known as 'green screen' or 'blue screen' and is essential for creating seamless composites by isolating subjects from their backgrounds. Chroma keyers play a crucial role in visual effects, enabling creative storytelling by blending live-action footage with computer-generated imagery or other backgrounds.
Cinematic look: Cinematic look refers to the visual style of a film that enhances storytelling through elements like color, contrast, composition, and camera movement. This aesthetic is achieved through careful manipulation of lighting and color grading techniques, which create a specific mood and atmosphere, making the film feel more immersive and engaging. A well-executed cinematic look can elevate the viewer's emotional connection to the narrative and characters.
Color grading panel: A color grading panel is a specialized hardware device used in post-production to adjust the color and tonal quality of video footage. It allows colorists to manipulate aspects such as brightness, contrast, saturation, and hue with precision, enhancing the visual storytelling of a project. The tactile controls and user-friendly layout enable a more intuitive workflow, making it easier to achieve desired artistic effects in the final product.
Color matching: Color matching is the process of ensuring that colors across different devices and media are consistent and visually harmonious. This involves adjusting color values to maintain continuity in visual storytelling, whether it’s for lighting setups, camera settings, or post-production workflows. Achieving effective color matching is crucial for maintaining the intended mood and aesthetics throughout a film or video project.
Color space conversions: Color space conversions refer to the process of changing color information from one color space to another, allowing for consistency and accuracy in the representation of colors across different devices and media. This is crucial for achieving the desired visual quality in digital imaging, as various devices (like cameras, monitors, and printers) interpret and display colors differently. Effective color space conversions ensure that color grading and correction tools can manipulate and render images in a way that remains true to the creator's vision.
Color wheel: The color wheel is a visual representation of colors arranged according to their chromatic relationships. It serves as a tool for understanding how different colors interact, allowing creators to make informed choices in visual storytelling, emotional impact, and aesthetics, especially in the context of color psychology, correction techniques, and color management strategies.
Complementary colors: Complementary colors are pairs of colors that, when combined, cancel each other out and produce a grayscale color like white or black. This concept is key in creating visual contrast and harmony in various artistic fields, allowing for effective color psychology and symbolism, as well as enhancing color schemes and palettes.
Contrast: Contrast refers to the difference in luminance or color that makes an object distinguishable from other objects and the background. It plays a crucial role in visual storytelling by influencing how viewers perceive depth, mood, and focus within a scene. By manipulating contrast, cinematographers can enhance the emotional impact of their work and guide the audience's attention through color correction, grading tools, and creative techniques.
Dan Mendelowitz: Dan Mendelowitz is a notable figure in the field of color correction and grading, recognized for his contributions to the development of innovative tools and techniques that enhance visual storytelling in film and video production. His work emphasizes the importance of color as a critical element in creating mood, conveying emotions, and shaping audience perception. By utilizing advanced color correction methods, he has influenced how cinematographers approach visual aesthetics and narrative coherence.
DaVinci Resolve: DaVinci Resolve is a professional video editing software developed by Blackmagic Design that integrates editing, color correction, visual effects, motion graphics, and audio post-production in a single application. It is highly regarded for its robust color grading capabilities and workflow efficiency, making it a popular choice among filmmakers and video editors.
Dci-p3: DCI-P3 is a color space defined by the Digital Cinema Initiatives for digital cinema projection. It offers a wider color gamut compared to the traditional sRGB color space, allowing for more vibrant and accurate colors in film production and display. This color space is essential for ensuring consistency and quality in color reproduction, particularly in high dynamic range (HDR) workflows, enhancing the visual experience in both color correction and grading processes.
Display Calibration: Display calibration is the process of adjusting a monitor's settings to ensure accurate color representation, brightness, contrast, and gamma levels. This process is essential for achieving consistent and reliable visuals in both color correction and grading, as well as ensuring that the colors seen on screen match the intended output throughout the production workflow.
Gain controls: Gain controls refer to the adjustments made to amplify or reduce the intensity of the signal captured by a camera sensor. This process is crucial in managing exposure, allowing cinematographers to manipulate the brightness and clarity of the footage. Effective use of gain controls can enhance the overall image quality and help achieve the desired aesthetic during color correction and grading.
Gamma controls: Gamma controls are tools used in color grading and correction that adjust the luminance of an image, specifically influencing the midtones without drastically affecting highlights and shadows. They play a crucial role in achieving desired visual aesthetics by altering the brightness and contrast levels of footage, ensuring that the final output meets the intended artistic vision. By modifying the gamma curve, these controls can enhance the overall image quality, bringing depth and richness to colors while preserving detail in various lighting conditions.
Histograms: Histograms are graphical representations that display the distribution of pixel values in an image, showing how many pixels fall within specific brightness ranges. This visual tool is crucial for assessing exposure and tonal range in an image, which directly relates to color correction and grading processes, allowing filmmakers to make informed adjustments for achieving desired visual aesthetics.
Hue vs Saturation Curves: Hue vs Saturation Curves are graphical representations used in color correction and grading that illustrate the relationship between hue and saturation levels in an image. These curves allow filmmakers and colorists to manipulate specific colors' saturation while maintaining their hue, enabling more precise control over the visual aesthetics of a scene. By adjusting these curves, one can enhance or reduce certain colors to achieve a desired look without affecting the overall balance of the image.
Icc profiles: ICC profiles are standardized data files that describe how colors should be represented in different devices, ensuring consistent color reproduction across various media. They play a crucial role in maintaining color fidelity during the processes of color correction and grading, as well as in managing the overall color workflow from capture to output.
Kirk Baxter: Kirk Baxter is a prominent film editor known for his collaboration with director David Fincher on various high-profile films, including 'The Social Network' and 'Gone Girl.' He is recognized for his innovative editing techniques and a keen understanding of how editing shapes the narrative flow, particularly in relation to color correction and grading tools that enhance the overall visual aesthetic of a film.
Layer-based workflows: Layer-based workflows are a method of organizing and manipulating digital images or video in a non-destructive manner, allowing users to apply adjustments and effects on separate layers. This approach provides flexibility and control, making it easier to tweak specific elements without affecting the entire image or clip. By separating tasks into different layers, color correction and grading tools can be more effectively utilized, enabling detailed adjustments for better final results.
Lift controls: Lift controls are tools used in color correction and grading that allow for adjustments in the brightness and tonal range of an image, particularly focusing on the shadows, midtones, and highlights. These controls help to balance an image's exposure and ensure that the colors are represented accurately, which is essential for achieving a desired visual style. Mastering lift controls is vital for filmmakers and colorists as it directly impacts the mood and atmosphere conveyed in a scene.
Luma keyers: Luma keyers are a type of video processing tool that separates and removes elements from a video based on their brightness levels, or luminance. They enable filmmakers to create effects such as compositing by isolating specific areas of an image that fall within a defined luma range, allowing for adjustments in color correction and grading. By manipulating brightness, luma keyers play a vital role in enhancing visual storytelling through dynamic scene composition.
LUTs (Look-Up Tables): LUTs, or Look-Up Tables, are mathematical formulas used to map one set of colors to another in digital imaging. They are essential tools in color correction and grading, allowing filmmakers to achieve a desired look by transforming the color space of an image. By applying LUTs during the post-production process or on-set monitoring, creatives can maintain consistency in color grading and quickly preview the intended visual style of a project.
Node-based workflows: Node-based workflows refer to a system of organizing and managing various tasks, processes, or elements as interconnected nodes in a visual interface. Each node represents a specific operation or effect, such as color correction or grading, and allows users to connect them in a way that visually maps out the flow of work, making it easier to manipulate and adjust complex processes, especially in color grading and correction.
Parade Displays: Parade displays refer to the visual representation of color data in video and film, often used to analyze and adjust color balance and grading. This technique allows colorists and cinematographers to see how colors interact, ensuring that the final image adheres to a specific aesthetic or mood. Parade displays can highlight issues such as color clipping, balance, and overall tonal range, making them essential tools in the color correction and grading process.
Power Windows: Power windows are advanced tools used in color correction and grading that allow for selective adjustments of specific areas within an image or video frame. They enable artists to create more precise color changes and enhancements, focusing on particular parts of a shot while leaving the rest untouched. This feature is essential for achieving nuanced primary and secondary color corrections, managing the color workflow efficiently, and executing creative grading techniques.
Primary color correction: Primary color correction refers to the process of adjusting the overall color balance of a video or image, focusing on the three primary colors: red, green, and blue. This technique is essential in achieving a visually appealing and consistent look by correcting color imbalances, enhancing brightness, and improving contrast before any secondary adjustments are made. It serves as the foundation for all subsequent color grading processes, allowing for more refined edits that target specific areas of an image.
Rec. 709: Rec. 709 is a color space defined by the International Telecommunication Union (ITU) for high-definition television (HDTV). It establishes standards for the color gamut, transfer characteristics, and other technical parameters to ensure consistent and accurate color representation across different display devices and video production workflows.
Saturation: Saturation refers to the intensity or purity of a color, indicating how vivid or muted it appears. Higher saturation means more vibrant colors, while lower saturation leads to more subdued, grayish tones. Understanding saturation is crucial for manipulating colors effectively during post-production processes like color correction and grading, where achieving the desired visual impact can significantly influence the mood and style of a project.
Secondary color correction: Secondary color correction is the process of adjusting specific colors in an image after primary corrections have been made, allowing for more detailed and nuanced control over the visual elements. This technique focuses on altering colors in selected areas while preserving the overall integrity of the image, which is crucial when working with complex color palettes. Secondary color correction is particularly useful for enhancing skin tones, correcting color casts, and creating a desired mood or atmosphere in a scene.
Tangent Element: A tangent element refers to a specific color correction or grading tool that adjusts the hue of a particular color within the image while keeping adjacent hues intact. This tool allows for precise modifications to ensure that colors remain balanced and visually appealing, which is crucial in achieving the desired aesthetic for any visual project. By manipulating tangent elements, cinematographers can achieve greater control over how colors interact and appear in the final image.
Trackers: Trackers are essential tools in color correction and grading that allow filmmakers to isolate specific areas of an image for adjustment without affecting the entire frame. They work by following the movement of objects or areas throughout a scene, enabling targeted enhancements like color changes, brightness adjustments, or exposure modifications while maintaining the integrity of the surrounding footage. This precision is crucial for achieving a polished final look in post-production.
Vectorscopes: Vectorscopes are specialized tools used in video production and post-production to visualize and analyze the color information in a video signal. They display the chrominance data, allowing users to assess color balance, saturation, and hue in a graphical format. By interpreting the data provided by vectorscopes, filmmakers can make informed decisions regarding color correction and grading, ensuring that the final output aligns with their creative vision.
Vintage style: Vintage style refers to a specific aesthetic that evokes the charm and characteristics of past eras, often incorporating elements from the early to mid-20th century. This style is commonly used in cinematography to create a nostalgic or timeless feel in visual storytelling, often achieved through the use of particular color palettes, film grain, and lighting techniques that mimic older film stock.
Waveform monitors: Waveform monitors are specialized tools used in video production and post-production to measure and display the color and luminance information of a video signal. They provide visual representations of the brightness levels across the image, enabling users to assess exposure, color balance, and potential clipping. This makes them essential for color correction and grading, as well as for on-set monitoring to ensure that the footage meets the desired technical standards.
© 2024 Fiveable Inc. All rights reserved.
AP® and SAT® are trademarks registered by the College Board, which is not affiliated with, and does not endorse this website.